
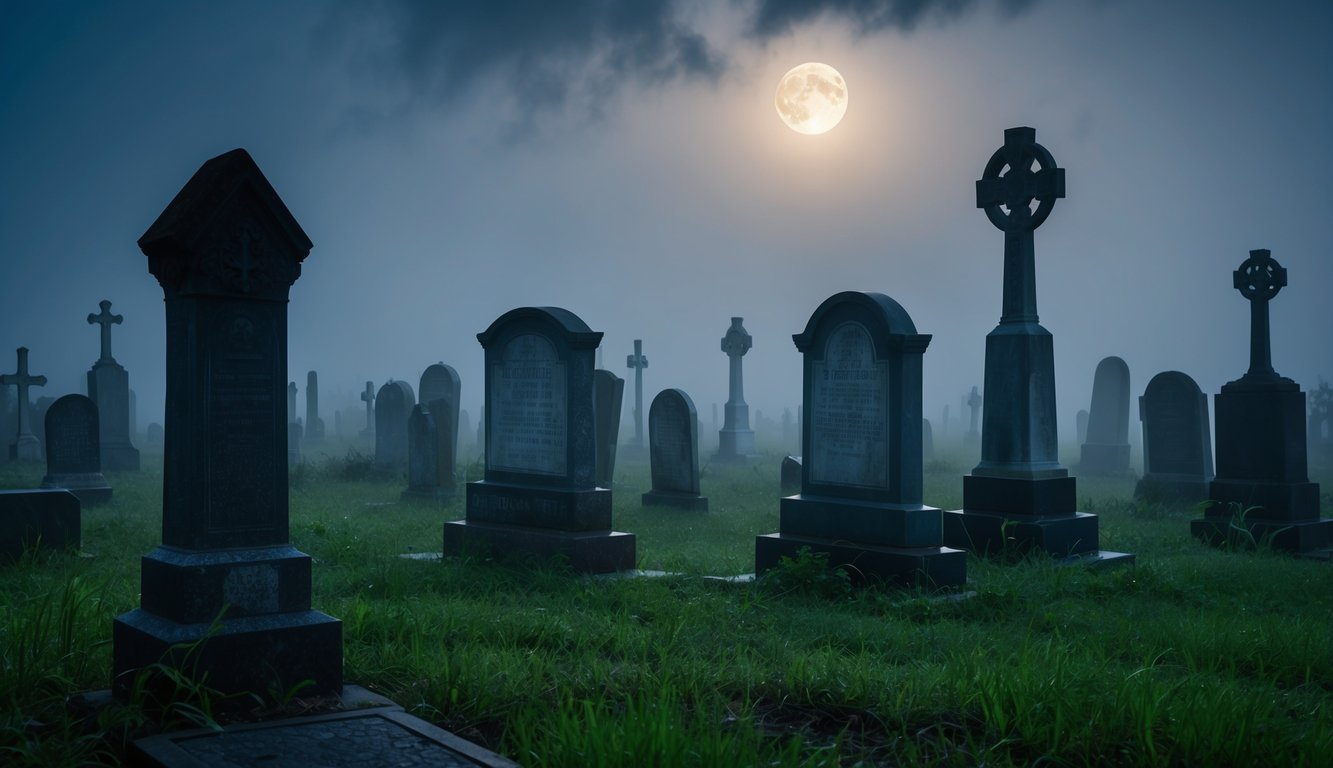
Making realistic Halloween cemetery stones can turn your yard into a spooky graveyard. With some basic materials and creativity, you can craft eerie tombstones that look old and weathered. You can make realistic looking Halloween cemetery stones using foam insulation boards, carving tools, and paint to create unique designs and creepy effects.
These DIY gravestones add a creepy touch to any Halloween display. They’re fun to make and let you customize your decorations. Kids and adults alike can enjoy crafting their own spooky cemetery scene.
Key Takeaways
- Foam insulation boards make great bases for DIY tombstones
- Carving and painting techniques create realistic weathered effects
- Custom designs and nighttime lighting enhance the creepy atmosphere
Planning Your Halloween Cemetery
Making a spooky Halloween cemetery starts with good planning. Let’s look at how to pick a spot, sketch out your ideas, and find cool inspirations.
Choosing the Right Location
Pick a spot in your yard that people can see easily. The front yard often works best. Make sure it’s flat and has enough space for all your tombstones. Check for any underground pipes or wires before you start digging.
Think about lighting too. A dark corner can be extra creepy, but you’ll need some light so people can see your work. Maybe use some spooky lighting to set the mood.
Don’t forget about the weather. If it’s windy, your tombstones might fall over. Pick a spot with some shelter if you can.
Sketching a Layout
Grab a piece of paper and draw your yard. Mark where you want each tombstone to go. Mix up the sizes and shapes to make it look real.
Add paths between the stones. This helps people walk through your cemetery safely. You can use fake cobblestones or just leave clear spaces.
Plan for other decorations too. Maybe add a creepy entrance arch or some fake trees. Don’t forget spots for fog machines or speakers if you’re using them.
Gathering Inspirations
Look at real cemeteries for ideas. Take a walk through one if you can. Notice how the stones are placed and what they look like.
Check out Halloween stores and websites. They have lots of cool cemetery props you can copy. YouTube tutorials are great for learning how to make realistic tombstones.
Old horror movies are another good place to find ideas. Pay attention to how they make their cemeteries look creepy. You might spot some tricks you can use in your own yard.
Materials and Tools Needed
Making realistic Halloween cemetery stones requires a few key supplies. Here’s what you’ll need to create spooky tombstones for your yard haunt.
Types of Foam and Their Uses
Insulation foam board is the main material for DIY tombstones. It’s lightweight, easy to cut, and takes paint well.
You can find foam board at most hardware stores. It comes in different thicknesses:
- 1/2 inch: Good for small stones
- 1 inch: Ideal for medium-sized tombstones
- 2 inch: Best for large or detailed designs
Pink or blue foam works great. White foam is okay too, but may need more coats of paint.
For added realism, grab some spray foam insulation. Use it to create mossy textures or fill in cracks.
Cutting Tools and Safety Gear
To shape your tombstones, you’ll need:
- Utility knife
- Hot wire foam cutter
- Sandpaper (various grits)
For safety, don’t forget:
- Work gloves
- Safety glasses
- Dust mask
A sharp blade is key for clean cuts. Change blades often. Hot wire cutters make curved shapes easier.
Coarse sandpaper smooths rough edges. Fine grit gives a polished finish.
Always wear safety gear. Foam dust can irritate your eyes and lungs.
Adhesives and Paints
To decorate your tombstones, you’ll need:
- Exterior latex paint (gray or stone colors)
- Black spray paint
- Acrylic craft paints
- Paintbrushes (various sizes)
- Foam brushes
- Construction adhesive
Start with a base coat of exterior latex. It sticks well to foam. Spray paint adds shadows and depth.
Craft paints are great for details. Use them to add moss, cracks, or spooky writing.
Construction adhesive helps attach separate pieces. It’s stronger than regular glue.
Weatherproofing Essentials
To make your tombstones last, use:
- Clear spray sealant
- Wooden stakes
- Zip ties or wire
Spray sealant protects paint from rain. Apply 2-3 coats for best results.
Wooden stakes keep tombstones upright. Pound them into the ground first.
Zip ties or wire attach the foam to stakes. This stops them from blowing away.
For extra protection, store tombstones indoors when not in use. This helps them last for many Halloweens to come.
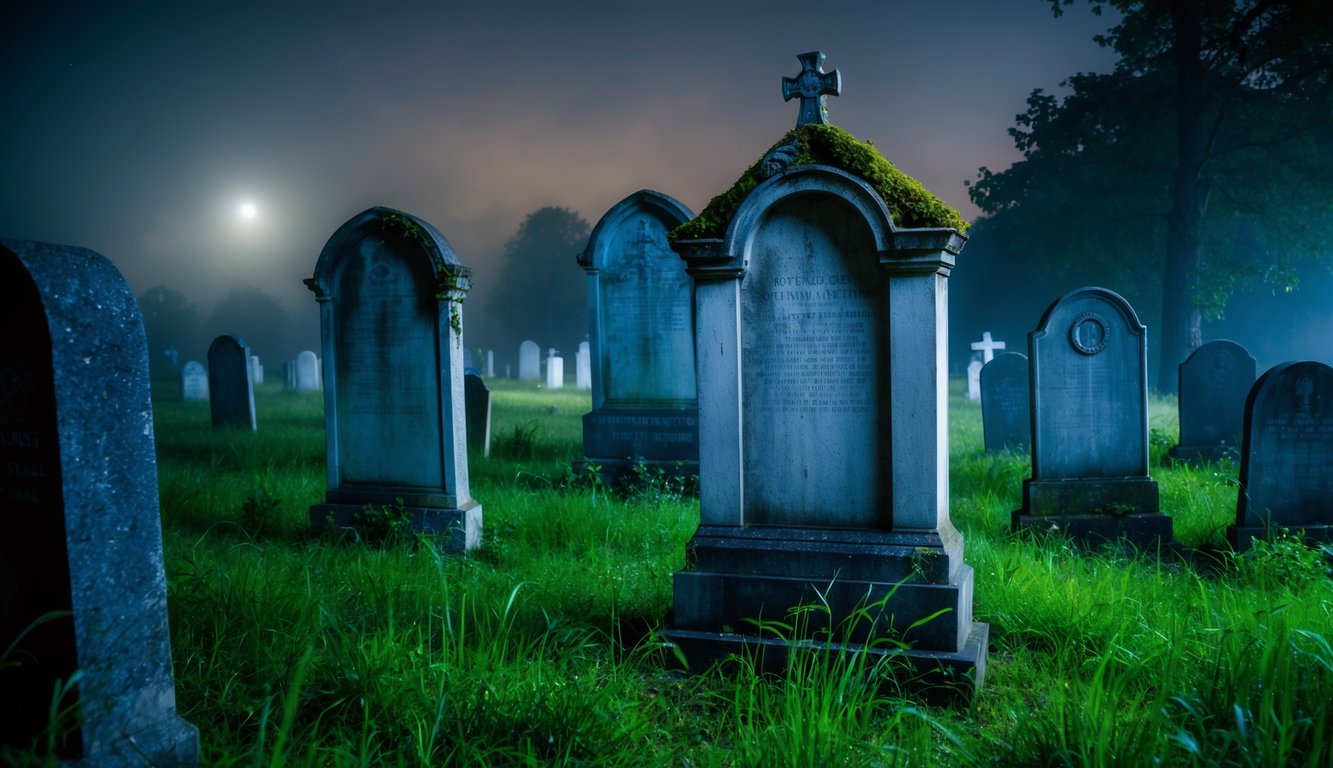
Designing Your Tombstones
Creating spooky tombstones is a key part of making a Halloween cemetery. The design affects how real and creepy they look. Let’s explore some ways to make your tombstones stand out.
Shapes and Sizes
Tombstones come in many shapes. Common ones are rectangles, obelisks, and crosses. Mix it up to make your graveyard look real. Use different sizes too. Some can be tall and thin, others short and wide.
Foam insulation boards work great for making tombstones. They’re easy to cut and shape. Try using a hot wire cutter for smooth edges.
Don’t make all your stones the same. Vary their heights from 2 to 5 feet. This makes your cemetery look more natural.
Etching Names and Epitaphs
Names and dates add realism to tombstones. Pick spooky or funny names for extra fun. Use a sharp tool to carve into the foam.
Here are some ideas for epitaphs:
- “Here lies Tom. He wasn’t fast enough.”
- “I told you I was sick!”
- “Beware all who enter here”
Make the text look old by using an uneven hand. Add cracks or chips around the letters for a worn look.
Adding Decorative Elements
Small details make tombstones look real. Add moss, cracks, or weathering effects to age them. Use paint or spray texture for a stone-like finish.
Try these decorations:
- Fake vines or ivy
- Small plastic skulls
- LED candles for eerie lighting
Don’t overdo it. A few well-placed items look better than too many. Keep some stones simple and others more detailed for variety.
Carving and Shaping Techniques
Making realistic Halloween cemetery stones takes some skill with carving and texturing. The right methods can turn plain foam into spooky, weathered-looking tombstones.
Basic Carving Methods
To start carving, you’ll need the right tools. A hot wire cutter works great for smooth cuts in foam. For more detailed work, try small knives or clay sculpting tools.
Begin by sketching your design on the foam. Cut out the basic shape first. Then slowly carve away smaller pieces to refine the form.
Practice on scrap foam before working on your final piece. This helps you get a feel for how the material behaves. Go slow and be patient – rushing can lead to mistakes.
Creating Realistic Cracks and Texture
To make cracks, use a sharp knife to score lines into the foam. Vary the depth and width for a natural look. You can widen cracks by gently pulling the foam apart.
For stone-like texture, try dabbing the surface with a crumpled ball of aluminum foil. This creates tiny pits and bumps. A wire brush can also add subtle scratches and grooves.
Carving random chips and nicks along edges makes the stone look worn. Use sandpaper to soften sharp corners for an aged effect.
Eroding Techniques for an Aged Look
Weathering gives tombstones that creepy, old graveyard vibe. One easy trick is to use a heat gun to slightly melt and warp the foam surface. This creates an eroded look.
Another method is building up layers of paint and sealant, then sanding some away. This mimics how real stone wears over time. Focus on edges and raised areas where natural erosion occurs.
You can also glue on bits of sand or gravel in spots. As paint wears off these areas, it’ll look like the stone is crumbling. Remember, subtle effects often look more realistic than going overboard.
Painting and Finishing Touches
The right paint job can make your Halloween cemetery stones look old and weathered. These techniques will add realism and spooky charm to your props.
Base Coating and Dry Brushing
Start by painting the entire tombstone black. Use matte exterior acrylic paint for durability. Let it dry completely.
Next, dry brush lighter shades over the black base. Use a nearly dry brush with gray paint. Lightly drag it across raised areas. This creates highlights and texture.
Add more layers of lighter grays. Work up to white for the brightest highlights. Focus on edges and high points. This mimics how real stone weathers over time.
Creating Moss and Mold Effects
Mix green and brown paints to make a mossy color. Dab this on with a sponge. Focus on lower areas where moisture would collect.
For mold, use very light gray or white paint. Apply it sparingly with a dry brush. Add touches of green or brown for variety.
You can also use real moss or lichen. Glue small pieces in damp-looking spots. This adds great texture and realism to your tombstones.
Faux Stone Painting Techniques
To make fake marble, start with a light gray base. Use a feather to add veins in darker gray. Blend them gently with a dry brush.
For granite, speckle different shades of gray over your base coat. Use a toothbrush to flick on tiny dots of paint.
Sandstone looks great with a tan base. Dry brush with orange and brown. Add streaks of rust for an aged look.
Remember to seal your finished tombstones. This protects your hard work from rain and keeps the paint from chipping.
Setting Up the Scene
Creating a spooky Halloween cemetery starts with the right layout. Here’s how to set up your scene for maximum impact.
Positioning the Tombstones
Place your tombstones at different angles and depths. This makes the graveyard look more natural and old. Don’t line them up straight – that’s too neat for a creepy cemetery!
Mix up the sizes and shapes of your DIY tombstones. Put bigger ones in the back and smaller ones up front. This creates depth and makes your yard look bigger.
Use stakes to keep the tombstones steady. Stick them deep into the ground so they don’t fall over in the wind.
Adding Faux Ground Cover
Spread fake moss or leaves around the base of the tombstones. This hides the stakes and makes the graves look old and forgotten.
You can use:
- Green spray paint on straw
- Shredded brown paper bags
- Fake cobwebs stretched thin
Sprinkle some dirt on the tombstones too. It adds to the old, dusty look.
Incorporating Additional Props
Add scary extras to your graveyard. Stick a few plastic bones or skulls in the “dirt” near the tombstones.
Hang some spooky lanterns from tree branches or shepherd’s hooks. The soft glow makes eerie shadows at night.
Don’t forget a gate or fence! You can make a simple one with PVC pipes painted black. Or use an old garden arbor as your cemetery entrance.
Lastly, add a fog machine for extra creepiness. The mist rolling over the graves looks super spooky!
Nighttime Effects

A spooky Halloween cemetery comes alive after dark. The right lighting, fog, and sounds can turn a basic graveyard into a haunting spectacle. These effects work together to create an eerie atmosphere that will thrill visitors.
Lighting to Create Ambience
Lighting is key for setting the mood in a Halloween graveyard. Use dim, colored lights to make the scene creepy. Put blue or green bulbs in low-watt fixtures. This casts an otherworldly glow on the tombstones.
Uplighting works well too. Place small spotlights at the base of gravestones. This makes long shadows that look scary. For a spooky effect, use flickering bulbs or candles in lanterns.
Don’t forget about backlighting. Put lights behind tombstones to make them stand out. This creates a cool silhouette look. Strings of orange lights can add a soft glow to bushes and trees.
Fog Machines and Placement Tips
Fog adds mystery to any graveyard scene. Put a fog machine near the ground to make low-lying mist. This looks like it’s rising from the graves. Hide the machine behind a tombstone or bush.
Use a fan to move the fog around. This spreads it out and makes it last longer. For best results, run the machine in short bursts. This keeps the fog from getting too thick.
Place fog in key spots. Near the entrance works well. It greets visitors with an eerie vibe. Put some by important tombstones too. This draws attention to them.
Cold air helps fog stay low. If it’s warm out, try using ice in the fog machine. This makes the fog heavier so it hugs the ground better.
Sound Effects and Speakers Setup
Scary sounds take a graveyard to the next level. Use hidden speakers to play spooky noises. Creaking gates, howling winds, and ghostly moans work great. Mix in some owl hoots and wolf howls too.
Place speakers around the yard. This creates surround sound. Put some near the entrance and others deeper in the graveyard. Use weatherproof speakers if you can.
Keep the volume low. Subtle sounds are often scarier than loud ones. They make people lean in to listen. This builds tension and makes the experience more fun.
Try using a timer for your sounds. This way, they don’t play non-stop. Random noises can be more startling than constant ones. It keeps visitors on their toes!
Maintenance and Storage
Taking care of your Halloween cemetery stones after the spooky season is key. Good upkeep and smart storage will make them last for many Halloweens to come.
Cleaning and Repairs Post Halloween
After the trick-or-treaters are gone, it’s time to clean up. Brush off dirt and leaves from your stones. Use a damp cloth to wipe them down. Let them dry fully before you put them away.
Check for any cracks or chips. Small fixes now can stop big problems later. Use foam glue for quick repairs. Paint over any scratches to keep them looking scary-good.
For wooden stones, add a new coat of sealant. This helps protect them from moisture damage. Foam stones might need a fresh layer of paint to stay spooky.
Safe Storage Solutions
Good storage keeps your stones safe until next Halloween. Wrap each stone in bubble wrap to prevent scratches. Put them in boxes, standing up like books on a shelf.
Keep the boxes in a dry place. A garage or closet works well. Avoid damp basements that could warp your stones.
Label your boxes. Write “Handle with Scare” for a fun touch. This helps you find them easily next year.
Stack lighter boxes on top of heavier ones. This stops the stones from getting squished. With good care, your spooky graveyard will be ready to haunt year after year!
Frequently Asked Questions
Making Halloween tombstones can be fun and easy. Here are some tips to help you create spooky graveyard props for your yard.
What’s the easiest way to craft a DIY tombstone for my Halloween decor?
The easiest way is to use foam board. Cut it into a tombstone shape. Paint it gray. Add fake cracks and moss for a creepy look.
Got any creative ideas for making my own tombstone props?
Try using different shades of gray paint for a realistic stone effect. Add funny or scary epitaphs. Use glow-in-the-dark paint for extra spookiness at night.
Can I make a tombstone using wood, and how would I do that?
Yes, wood works well. Cut plywood into a tombstone shape. Sand the edges. Paint it gray. Add wooden stakes to the back to stick it in the ground.
What’s the trick to making heavy-duty tombstones that won’t blow away?
Use thick foam board or plywood. Attach wooden stakes to the back with strong glue. Push the stakes deep into the ground for stability.
What kind of paint should I use to get that real spooky gravestone look?
Use exterior latex paint in shades of gray. Add black paint for shadows. Dry brush with white for highlights. This creates a stone-like texture.
Is cardboard a good choice for making homemade tombstones, and how can I weatherproof it?
Cardboard can work for indoor use. For outdoor tombstones, coat the cardboard with waterproof sealant. Paint it with exterior paint for extra protection. But foam or wood are better choices for outdoor use.