
I remember the first time I carved a pumpkin. And it was terrible, but I learned. And with Halloween fast approaching, I wanted to share the knowledge I have accumulated. So with that said, here’s a quick guide on how to carve a jack o’ lantern.
Carving a jack o’ lantern is a fun fall tradition that brings out creativity. To carve a jack o’ lantern, pick a pumpkin, cut off the top, scoop out the insides, draw a face, and carefully cut along the lines with a carving tool.
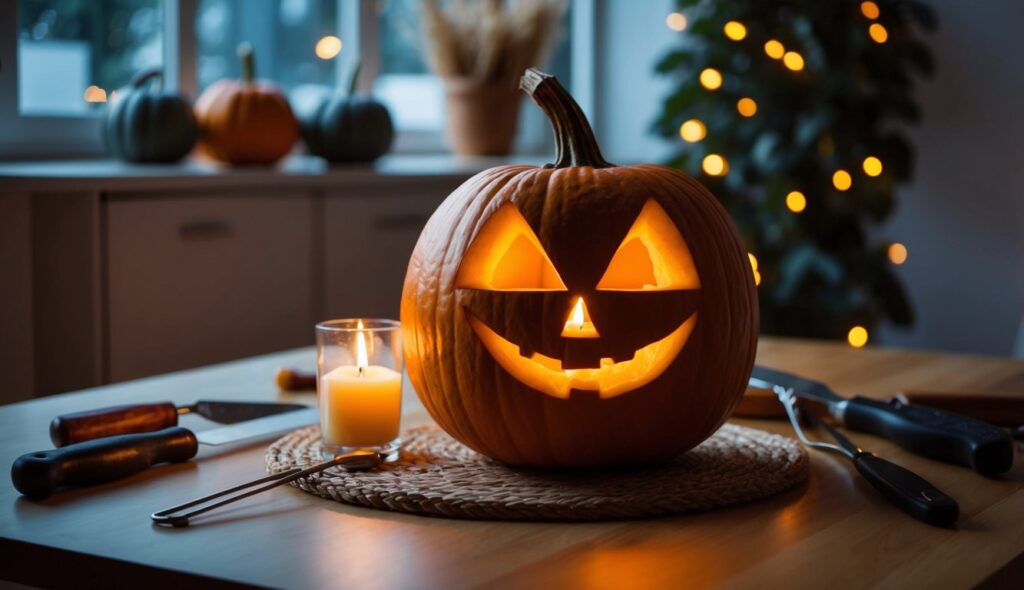
With a few simple steps, anyone can make a cool jack o’ lantern. It’s a great activity for kids and adults alike. The glowing pumpkins add a festive touch to any porch or windowsill on Halloween night.
Key Takeaways
- Pick a firm pumpkin and use the right tools for easy carving
- Draw your design first before cutting into the pumpkin
- Keep carved pumpkins fresh longer by coating cut edges with petroleum jelly
Choosing the Perfect Pumpkin
Picking the right pumpkin is key to creating an awesome jack-o’-lantern. The pumpkin’s shape, size, and condition all play a role in how well it will carve and last.
Factors to Consider
Look for a pumpkin with a flat bottom so it won’t roll around. The stem should be thick and green, which shows the pumpkin is fresh. Avoid pumpkins with soft spots or bruises.
Size matters too. Big pumpkins are fun but can be hard to move. Medium-sized ones work well for most carvers. The shape is important – pick one that fits your design idea.
Knock on the pumpkin. A hollow sound means it’s ripe and ready. Check that the skin is hard. Soft skin won’t hold up well to carving.
And remember, there are over 700 varieties of pumpkin, so choose one that fits the mood you want to create. I’ve seen amazing white and green jack o’ lanterns. Don’t be afraid to choose something a little different.
Where to Buy Your Pumpkin
Pumpkin patches offer a fun experience for picking your own. You can see lots of options and pick the perfect one. Many have other fall activities too.
Grocery stores and farmers markets also sell pumpkins. These are good if you’re short on time. The selection may be smaller, but the pumpkins are often cheaper.
Garden centers sometimes have unique pumpkin varieties. You might find cool colors or shapes there. They may cost more, but you’ll get something special.
Buying local supports nearby farms. The pumpkins are often fresher too. Ask the seller when they were picked for the best info on how long they’ll last.
Assembling Your Carving Kit

Getting ready to carve a jack o’ lantern is fun and easy. You just need the right tools and safety gear to make your pumpkin masterpiece.
Essential Tools
To carve a great jack o’ lantern, you’ll want a good pumpkin carving kit. This should include:
• A big spoon for scooping out pumpkin guts
• A marker to draw your design
• Small, sharp knives for cutting
• A bigger knife for the lid
This kit includes gloves, which we found to be ideal for scooping out the inside of the pumpkin. Make sure to save the seeds. We have a recipe for making great pumpkin seeds.
That kit doesn’t include a market, but any sharpie will work for that
You can buy special pumpkin carving tools or use stuff from your kitchen. A ice cream scoop works well for cleaning out the pumpkin. An X-Acto knife is good for small details.
Don’t forget a bowl for the pumpkin insides and some newspaper to keep your workspace clean. If you don’t have newspapers laying around, and I know we don’t, packing paper works really well too. A battery-powered light or candle will make your jack o’ lantern glow.
Safety Equipment
Safety comes first when carving pumpkins. Here’s what you need:
• Cut-resistant gloves to protect your hands
• Safety glasses to shield your eyes
• A stable work surface
• Good lighting so you can see what you’re doing
Kids should always have an adult help them. It’s smart to use battery-powered lights instead of real candles. This makes your pumpkin safer.
Remember to keep your workspace dry. Wet hands or surfaces can make tools slip. Take breaks if your hands get tired. Rushing can lead to accidents.
Designing Your Jack O’ Lantern
Creating a unique design is the key to a great jack o’ lantern. Start with a simple idea and build on it to make your pumpkin stand out.
Sketching Your Design
Begin by drawing your design on paper. Pick a theme like spooky faces, animals, or scary scenes. Keep it simple if you’re new to carving. Stick figures and basic shapes work well.
Try different ideas until you find one you like. Free stencils can help if you need inspiration. These offer many options from easy to complex.
Remember to leave enough space between cut-out areas. This keeps your pumpkin strong. Think about how light will shine through your design. Bigger holes let out more light.
Transferring the Design onto the Pumpkin
Once you have your sketch, it’s time to put it on the pumpkin. Clean the pumpkin’s surface first. Then tape your paper design to the pumpkin.
Use a marker or pen to trace the design. Press firmly to make clear lines. For complex designs, poke small holes along the lines instead.
You can also draw right on the pumpkin. Dry-erase markers work well for this. They’re easy to wipe off if you make a mistake.
Make sure your design fits the pumpkin’s shape. Adjust it if needed. Wipe off extra markings when you finish tracing.
The Carving Process
Carving a jack o’ lantern takes a few key steps. Let’s go through the process to create a spooky Halloween pumpkin.
Cutting the Lid
Start by cutting the top of the pumpkin at an angle. This makes a lid that won’t fall in. Use a sharp knife and cut a circle around the stem.
Make the hole big enough to fit your hand inside. A bigger opening helps you scoop out the insides more easily.
Some people cut the bottom instead of the top. This can make it easier to put a candle inside later.
Scooping Out the Insides
Now it’s time to clean out the pumpkin. Use a big spoon or your hands to scrape out the seeds and stringy bits.
Put the guts in a bowl. You can save the seeds to roast later if you want.
Keep scraping until the inside walls are smooth. Thinner walls make carving easier and let more light shine through.
Don’t forget to scrape the bottom flat. This helps your candle sit straight.
Carving the Design
Before you start cutting, draw your design on the pumpkin with a marker. You can use stencils or draw freehand.
Cut along your lines with a small knife or pumpkin carving tool. Go slow and be careful.
Start with the bigger parts of your design first. Then do the smaller details.
If you make a mistake, you can stick the piece back on with a toothpick. When you’re done, wipe off any extra marker lines.
Try putting a light inside to see how it looks. You can always make the holes bigger if needed.
Preservation Tips
Keeping your jack-o’-lantern fresh for Halloween is easy with a few simple tricks. These tips will help your carved pumpkin last longer and look its best.
Post-Carving Preservation
After carving your pumpkin, you can use bleach to keep it fresh. Mix 1 teaspoon of bleach per quart of water. Dip the pumpkin in this mix or spray it on.
Let the pumpkin dry completely. This kills germs that cause rot.
You can also try other sprays. Some people use:
- Lemon juice
- Peppermint oil
- Vinegar
These natural options work well too. They smell nice and keep bugs away.
Coat the cut edges with petroleum jelly. This locks in moisture and slows drying.
Display and Lighting
Where you put your jack-o’-lantern matters. Keep it in a cool, dry spot. Direct sun can make it rot faster.
Bring your pumpkin inside at night. This protects it from animals and cold air.
For lighting, skip the candles. They dry out the pumpkin. Try these instead:
- Battery-operated LED lights
- Glow sticks
- Electric tea lights
These options are safer and don’t heat up the pumpkin. They also last longer than candles.
If it’s hot outside, put your pumpkin in the fridge when not on display. This slows down rot and keeps it fresh longer.
Cleanup and Safety
Cleaning up after carving and using candles safely are key parts of making a jack-o-lantern. These steps help keep your home tidy and prevent accidents.
Post-Carving Cleanup
After carving, you’ll have a mess to deal with. Start by gathering all the pumpkin pieces in a bowl. These can be composted or thrown away.
Wipe down your work area with soapy water. This gets rid of sticky pumpkin juice.
Don’t forget to clean your carving tools. Wash them with hot, soapy water and dry them well.
If you used markers on the pumpkin, clean off any extra lines. A damp cloth usually does the trick.
Lastly, put newspaper under your finished jack-o-lantern. This catches any drips or bits that fall out.
Candle Safety
Candles make jack-o-lanterns glow, but they need care. Always put the pumpkin on a flat, fire-safe surface.
Use battery-powered candles if you can. They’re safer and won’t burn out.
If you use real candles, choose short, wide ones. They’re less likely to tip over.
Never leave a lit pumpkin alone. Always blow out the candle when you’re not watching it.
Keep jack-o-lanterns away from things that can burn. This includes curtains, paper, and dry leaves.
Teach kids about fire safety. Show them how to light and put out candles safely.
Creative Ideas and Inspiration
Carving a jack-o’-lantern can be fun and easy. There are many cool ideas to try out this Halloween season.
One neat idea is to make a jack-o’-planter. Cut a big hole in your pumpkin and put flowers inside. It looks pretty and festive.
You can also try carving faces with different emotions. Make a happy face, a scary face, or a silly face. Kids love picking out the faces to carve.
For nature lovers, try carving woodland creatures. There are free stencils online for animals like owls, foxes, and deer.
Movie fans can carve their favorite characters. Think about carving Darth Vader, Mickey Mouse, or a superhero logo.
Here are some more quick ideas:
- Carve shapes like stars or hearts
- Make a spooky haunted house scene
- Cut out words or your house number
- Try a pretty pattern like swirls or zigzags
Don’t be afraid to mix it up. You can paint your pumpkin too. Or add things like fake spiders or candy corn for extra fun.
Remember, the goal is to have fun. Your jack-o’-lantern doesn’t have to be perfect. Just enjoy the process and get creative!
Not ready to carve? Here’s How to Draw a Jack O’ Lantern
Drawing a jack o’ lantern is a fun way to get into the Halloween spirit. Start by sketching a basic pumpkin shape – it should look like an oval that’s a bit wider at the bottom. Add a small stem on top. Now, it’s time to create the face!
For the eyes, you can draw triangles, circles, or any shape you like. The nose is often a small triangle pointing down. For the mouth, draw a wide smile with jagged teeth to make it look spooky or fun. Remember, you can make your jack o’ lantern scary or cute – it’s up to you!
Once you’re happy with the face, outline your drawing to make it stand out. Finally, color your jack o’ lantern. Use orange for the pumpkin, green for the stem, and black for the eyes, nose, and mouth. You can even add some shading to make it look more realistic.
With these simple steps, you’ll have a great jack o’ lantern drawing to show off!
Frequently Asked Questions
Carving a Jack O’Lantern can be fun and easy with the right tools and techniques. Here are some common questions people have about this Halloween tradition.
What steps are needed to carve a Jack O’Lantern?
To carve a Jack O’Lantern, start by cutting off the top of the pumpkin. Scoop out the seeds and pulp. Draw your design on the pumpkin. Use a small knife to cut along the lines. Remove the cut pieces and clean up the edges.
Can you carve a simple Jack O’Lantern if you’re a beginner?
Yes! Beginners can easily carve a Jack O’Lantern. Start with a basic design like a simple face. Use cookie cutters or stencils for easy shapes. Practice on a small pumpkin first to build confidence.
What tools do you need to carve a Jack O’Lantern?
You’ll need a few basic tools to carve a Jack O’Lantern. Get a sharp knife for cutting the top and carving. Use a big spoon for scooping out the insides. Grab some markers to draw your design. Xacto knives or pumpkin carving kits work great for detailed cuts.
Is it possible to carve a Jack O’Lantern without cutting into the pumpkin?
Yes, you can make a no-cut Jack O’Lantern. Paint a face or design on the pumpkin instead of carving. Use markers, acrylic paint, or adhesive decorations. This method is safer for kids and keeps the pumpkin fresh longer.
What’s the best way to preserve a Jack O’Lantern after carving?
To make your Jack O’Lantern last longer, keep it cool and dry. Spray the cut edges with lemon juice to prevent mold. Apply petroleum jelly to the carved areas to lock in moisture. Refrigerate it when not on display. You can also use LED flickering tea lights instead of candles so the inside of the jack o’lantern lasts longer.
Are there any safety tips to consider when carving a Jack O’Lantern?
Safety is key when carving pumpkins. Always cut away from yourself. Use sharp tools to avoid slips. Let adults handle the knife work for young kids. Keep a first aid kit nearby. Work in a well-lit area to see clearly.